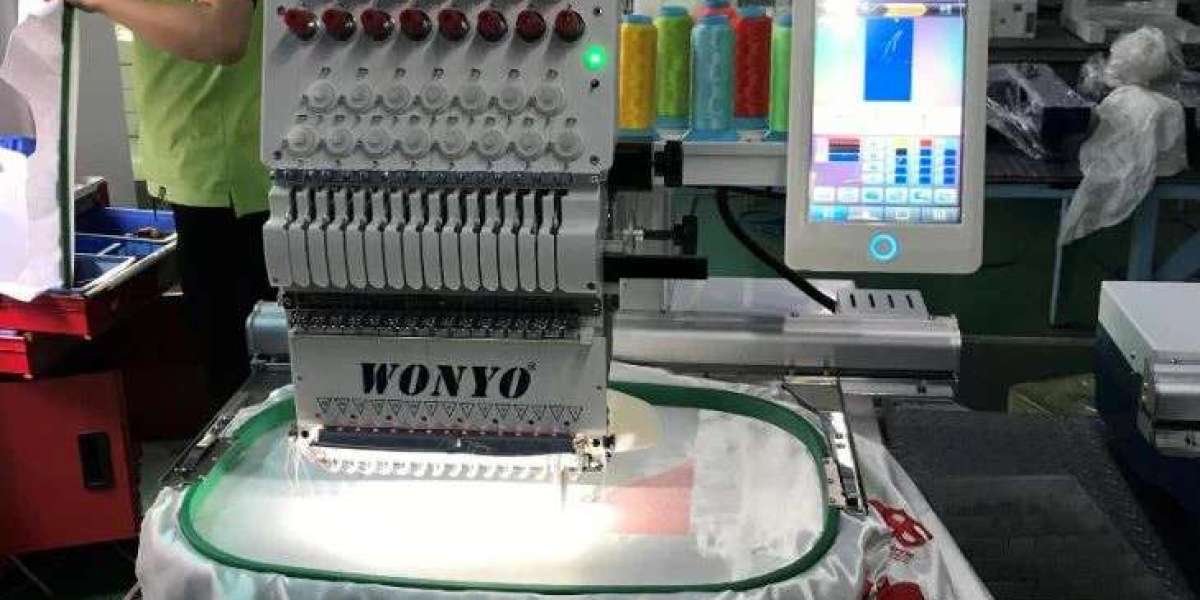
You have a beautiful embroidery design saved on your computer. It is in DST format from a client, or maybe JEF from another source. Your Brother machine needs PES. You fire up a converter, cross your fingers, and hope for the best. Sometimes it works. Sometimes you get error messages or designs that stitch out all wrong. Understanding how to use a Brother PES file Converter properly makes the difference between frustration and flawless production.
PES is the native language of Brother embroidery machines, developed specifically for their systems . It stores stitch data, color information, and machine codes like "stop," "jump," and "trim" . Getting files into this format correctly ensures your machine reads them accurately and stitches them beautifully.
Let me share expert tips for using PES converters effectively, whether you use Brother's own software, third-party tools, or professional services.
Understanding the PES Format
Before we dive into conversion tips, you need to understand what PES files actually contain. PES files are binary files with multiple sections storing different types of information .
Version data identifies which PES version the file uses. Values range from #PES0001 through #PES0060 . This matters because older machines may not read newer versions. A PE-300 only recognizes #PES0001, while advanced models like the PR680W handle #PES0060 .
Stitch data contains all the needle commands. Color information tells the machine where thread changes happen. Machine codes include commands for stopping, jumping, and trimming thread .
Different machines support different PES versions and have varying limits. The PE-800 supports up to 130,000 stitches and 15 color stops. Commercial PR-series machines can handle much larger designs, up to 750,000 stitches with auto-sectorization .
Expert Tip 1: Use Native Software When Possible
Brother's PE-DESIGN software is the gold standard for PES file conversion . It is designed specifically for Brother machines and understands all the nuances of the format.
How to convert in PE-DESIGN:
Open the Design Database
In the folder pane, select the folder containing your design
In the contents pane, select the file you want to convert
Click File, then Convert Format
From the Format Type selector, choose PES
Under Output To, select where to save the new file
Click Convert
The file converts and appears in your specified folder .
Why native software wins: PE-DESIGN preserves registration marks and color sequencing crucial for multi-needle machines . When you convert to PES, thread colors convert as if the file was imported into Layout & Editing .
For DST conversions specifically, PE-DESIGN lets you specify jump stitch trimming based on your machine's requirements . This level of control ensures files run smoothly.
Expert Tip 2: Know Your PES Versions
PES files are not all the same. Different versions support different features and machine capabilities.
Older PES versions (0001-0040) work with most Brother models including the PE-100 and PE-770. They typically support hoop sizes around 3.94 x 3.94 inches with basic color management .
Newer PES versions (0050-0060) work with advanced models like the PR680W and NQ3700D. They support larger hoops up to 200 x 300 mm, higher stitch counts, enhanced color metadata, and advanced editing features .
Expert move: When converting files, select the PES version that matches your specific machine. If you have an older machine, using a newer version may cause "Invalid File" errors. If you have a newer machine, older versions work but may not support advanced features.
Expert Tip 3: The DST Cleanse Technique
Here is a pro trick for stubborn files that refuse to convert correctly. If your Brother machine rejects a PES file, try the "DST cleanse" method .
Step 1: Convert the problematic PES file to DST using a tool like Wilcom TrueSizer or PE-Design. DST is a universal format that strips away problematic encoding.
Step 2: Convert the DST back to PES using Brother's PE-Design software, selecting the correct PES version for your machine.
This round-trip conversion often "resets" the file, removing hidden errors and restoring compatibility . It works because DST is a simpler format that commercial machines have used for decades. Converting through it can clear out corrupted data.
Expert Tip 4: Professional Software Alternatives
While PE-Design is ideal, several third-party options offer excellent PES conversion capabilities.
Wilcom Embroidery Studio provides precise stitch density control, advanced color management, and robust digitizing tools . It excels at preserving stitch integrity even when resizing up to 30%.
Hatch Embroidery delivers user-friendly conversion with professional output quality . Many small businesses choose Hatch for its balance of power and accessibility.
Embrilliance offers modular software for both Mac and Windows. It handles PES conversion and design editing with a user-friendly interface.
SewArt provides affordable entry-level conversion for beginners.
These tools excel at preserving color data and handling multi-layer designs . However, remember that DST files converted through any software lose color information, requiring manual mapping in your software .
Expert Tip 5: Free Tools That Actually Work
Not ready to invest in paid software? Free options exist, but understand their limitations.
DIME Toolshed is a free desktop application supporting batch processing. You can convert large collections of PES files, adjust thread configurations, and export to various formats . It is particularly useful for managing extensive design libraries.
Ink/Stitch is an open-source extension for Inkscape. It supports formats including DST, PES, and JEF . It offers powerful capabilities for users willing to invest time in learning. The trade-off is a steeper learning curve and potential struggles with auto-digitizing complex designs .
My Editor provides quick edits and format conversions without the complexity of full professional suites .
These free tools may not handle advanced color sequencing or specialty stitch effects as robustly as paid software . For simple conversions, they work great. For complex commercial work, invest in professional tools.
Expert Tip 6: Online Converters - Convenience vs. Security
Online converters like Convertio and WilcomWorkspace offer tempting convenience. Upload, select format, download, no installation required .
Pros: Works on any device with internet access, supports wide format range, no software to install.
Cons: File size limitations may restrict large designs. Intellectual property risks when uploading proprietary designs to third-party servers . Some online tools may not handle color data or stitch sequencing accurately.
Expert advice: For non-critical, personal projects, online tools work fine. For commercial designs or sensitive client work, stick with trusted desktop software . Once your artwork leaves your computer, you have no control over where it goes.
Expert Tip 7: Critical Adjustment Phase
Conversion is not just about changing file extensions. It is about preserving design integrity. After conversion, always adjust these parameters.
Stitch Density: For satin stitches, aim for 6-8 stitches per inch. Use your software's density adjustment tools to fine-tune for your target fabric and machine .
Color Mapping: DST files often lack embedded color data. Use your software's thread libraries to manually assign thread colors . The color sequence verification tool helps prevent mismatches during stitching.
Preview: Always preview your design on-screen before exporting. Spot density or color issues early .
Expert Tip 8: Test Before Production
This rule applies to every converted file. Never trust a conversion until you see it stitch on your actual machine with your actual fabric.
Run a test stitch on scrap material identical to your final garments. Use the same stabilizer, needles, and thread .
Verify stitch quality, color accuracy, and dimensional precision. Check registration between colors. Look for tension issues.
If anything looks off, return to your software and tweak. Adjust density, remap colors, or modify settings. Then test again.
This step saves more ruined garments than any other practice .
Expert Tip 9: Solving Compatibility Issues
When your Brother machine flashes "Invalid File," work through this troubleshooting checklist .
Check PES version: Ensure the file version matches your machine's capabilities. Older machines may need #PES0001.
Verify stitch count: The PE-800 supports up to 130,000 stitches. Exceeding limits causes errors .
Check hoop size: Ensure your design fits within your machine's maximum embroidery area.
Update firmware: Some models like the PR-1000 require firmware v2.1 or higher to read newer PES files .
USB formatting: Use FAT32 for USB drives. Avoid exFAT, NTFS, or SDXC cards .
File names: Use only standard alphanumeric characters. No accents or special symbols .
Safely eject USB drives: Always eject properly to prevent file corruption.
Expert Tip 10: When to Call the Pros
Sometimes the smartest move is letting experts handle conversion. Professional digitizing services like Absolute Digitizing, Digitizing Buddy, Cool Embroidery Design, and Absolute Digitizer specialize in creating perfect PES files for Brother machines.
You upload your artwork in any format.
They digitize manually using professional software.
You receive a perfect PES file in hours.
For complex designs, rush orders, or when quality cannot be compromised, this path makes sense. At $10-15 per design, professional services often cost less than buying software and spending hours learning to use it.
Conclusion
Using a Brother PES file converter effectively requires understanding the format, choosing the right tools, and following proven techniques. Native PE-Design software offers the most reliable path, preserving color data and machine instructions . Professional alternatives like Wilcom and Hatch deliver excellent results with advanced features . Free tools like DIME Toolshed and Ink/Stitch work for basic needs with some limitations .
Remember the expert tips. Know your PES versions and match them to your machine. Use the DST cleanse technique for stubborn files. Adjust density and color mapping after conversion. Test before production. Troubleshoot systematically when errors occur.
Your Brother machine deserves files engineered to perform. With these expert tips, your conversions will run smoothly, your designs will stitch beautifully, and your clients will stay happy.