Good packaging grabs attention fast. A well-designed bottle box can change a casual looker into a buyer.
This piece walks through practical design choices. It focuses on what matters for conversion and shelf appeal.
Target Audience and Market Positioning
Start by mapping buyer personas. Think luxury, mid-tier, eco-conscious, and gift-giving shoppers.
Many brands choose to visit a supplier that offers stylish custom bottle boxes because samples help decide finishes and fit.
Identify buyer personas (luxury, mid-tier, eco-conscious, gift-giving)
Luxury buyers look for weight, texture, and subtle details. Mid-tier buyers want clear value and good looks.
Eco-conscious shoppers check materials and labels. Gift buyers favor presentation and unboxing appeal.
Align bottle type (wine, spirits, flavors, cosmetics) with box style
Wine often suits tall, slim boxes with a snug insert. Spirits may need a wider base for stability.
Flavored drinks benefit from bright graphics. Cosmetics call for smaller, elegant rigid boxes.
Define value proposition the packaging conveys (premium, sustainable, innovative)
Decide the single idea the box should deliver. Premium means weight and restrained design.
Sustainable shows raw materials and certification marks. Innovative uses unique openings or inserts.
Core Design Principles for Bottle Boxes
First impression: shelf impact, color psychology, and typography
Bold colors stop the eye. Contrasting tones help a product stand out on a crowded shelf.
Typeface must be legible from a distance. Use a clear hierarchy for brand and product name.
Structural integrity: protection, ergonomics, ease of use
Protect the bottle with a proper insert. The right fit prevents movement in transit.
Design for easy carrying and simple opening. A frustrating box ruins the experience.
Visual hierarchy: focal point, branding, product visibility
Pick one focal point. Let logo or product name own that space.
Use images or a window for product visibility, but keep balance with brand identity.
Brand consistency: logo placement, brand colors, taglines
Repeat brand elements but avoid clutter. Consistency builds recognition over time.
Place the logo where shoppers naturally look first. Use matching color swatches across SKUs.
Storytelling through packaging: narrative elements on the box
Short copy can tell origin, tasting notes, or maker story. Keep it human and brief.
A small timeline or artisan note creates trust. Visual cues support the short story.
Materials, Finishes, and Sustainability
Material options: corrugated, kraft, chipboard, rigid boxes
Corrugated is strong and cost-friendly for shipping. Kraft reads natural and raw.
Chipboard and rigid boxes feel premium. Choose by product fragility and brand tone.
Weight considerations and protective inserts
Heavier materials add perceived value but raise shipping costs. Balance is key.
Inserts can be foam, molded pulp, or die-cut cardboard. Pick based on protection and eco goals.
Surface finishes: matte, gloss, soft-touch, foil stamping, embossing/debossing
Matte feels modern and soft. Gloss adds shine and vibrancy.
Foil and embossing create focal points. Use them sparingly to keep cost in check.
Ink choices: PMS matching, spot color vs. full color
PMS matching keeps brand color consistent across runs. Spot color saves cost on two-tone designs.
Full color is best for photos and gradients. Confirm proofs on the actual substrate.
Sustainability features: recyclability, FSC certification, minimal inks, compostable sleeves
Use recyclable or compostable materials when possible. Note any certifications clearly on the box.
Minimal ink and single-material constructions make recycling simpler for buyers.
Box Styles and Structural Options
Common styles: tuck-end, straight tuck, two-piece rigid, lid-only, sleeve
Tuck-end boxes are economical and fast to assemble. Two-piece rigid boxes feel high-end.
Sleeves add reveal moments. Lid-only boxes create a gift-like ritual.
Closure mechanisms: magnetic, ribbon, ribbonless, ribbon-tac
Magnets feel premium and repeatable. Ribbons add romance for gifts.
Ribbonless closures reduce parts and cost but can still look refined.
Custom inserts: foam, molded pulp, cavity trays, die-cut cardboard inserts
Foam offers supreme protection for fragile spirits. Molded pulp wins on sustainability.
Die-cut inserts are cost-efficient and recyclable if matched to the board type.
Die lines and precision: tolerances, bleed, box dimensions, safe margins
Keep important text inside safe margins. Allow bleed for edge-to-edge color.
Communicate tolerances with your manufacturer. Small misfits add up in mass runs.
Customization and Personalization Strategies
Limited editions and seasonal themes
Limited runs create urgency. Seasonal themes let brands refresh without a full redesign.
Small SKU changes can feel new if finishes or colors shift.
Brand collaboration and co-branding opportunities
Co-branded boxes can reach new audiences. Agree on shared visual rules first.
Use one bold logo placement and a smaller partner mark to keep clarity.
Colorways and finish variations by product line
Keep the base structure consistent and vary color or finish. It simplifies production.
Use a master dieline to avoid tooling costs for each variant.
Personalization techniques: embossing, hot foil, name/date customization
Embossing and foil feel personal and permanent. Variable name printing offers a bespoke touch.
Limit full personalization to higher margin SKUs to cover costs.
Variable data printing for tracking or gifting
Variable printing handles serial numbers, QR codes, and gift messages. It adds traceability.
Use it to tie packaging into loyalty or limited-series campaigns.
Visual Design Elements that Attract Buyers
Color palettes aligned with brand and product type
Choose palettes that match product tone. Darker tones read premium for spirits.
Bright palettes work well for flavored drinks and casual gift lines.
Typography choices for readability and brand voice
Select one display type and one body type. Keep contrast high for shelf legibility.
Script fonts can feel personal but test them at small sizes for readability.
Imagery and graphic motifs: heritage, craftsmanship, modern minimalism
Heritage cues like crests and engravings work for premium labels. Minimalism suits modern brands.
Graphic patterns can create texture without extra weight or cost.
Window/display options: clear windows, tinted plastics, acrylic inserts
Windows let shoppers see the bottle and label. Use them when the product label is a selling point.
Tinted windows add mood. Avoid oversized windows that compromise protection.
Ergonomic design: easy opening, resealability, reusability as a keepsake
Design for one-handed opening when possible. Resealable closures add long-term value.
Consider a box that doubles as storage or a gift box to extend life.
Practical Design Workflow
Discovery and brief intake checklist
- Target personas
- Budget and MOQ
- Shipping and retail constraints
- Regulatory needs
Concept ideation and mood boards
Collect references for color, texture, and form. Share tactile samples if possible.
Mood boards help align teams around one visual direction.
3D rendering and virtual prototyping
Use 3D mockups to test scale and shelf presence. They save time and cost.
Renderings show how light plays on finishes before printing.
Dieline creation and proofing process
Create dielines early and test fit with a physical mockup. Check all cut and fold lines.
Proofs must be signed off by stakeholders before tooling.
Material and finish samples approvals
Order samples for final checks. Approve substrate texture and print color on actual material.
Keep a record of signed samples for future runs.
Final mockups and pre-production approvals
Assemble final mockups and test-drop them. Confirm inserts and closures work as planned.
Only release to production after all criteria pass testing.
Branding and Retail Considerations
Shelf presence and how box design communicates at a distance
From several meters, shape and bold color read first. Text and small art read second.
Test mockups in realistic shelving to see actual impact.
In-store demonstrations and unboxing experience
An easy-to-open box aids demos. A neat unboxing keeps shoppers engaged.
Train staff on how the packaging should be handled during demos.
UPC/barcode placement and regulatory labeling
Place barcodes on a flat panel for scanners. Keep required labels readable and unobstructed.
Check local regulations for warning labels and content declarations.
Seasonal merchandising and planogram compatibility
Design for stackability and consistent shelf footprint. It helps retailers place your product.
Offer seasonal sleeves rather than new boxes to cut costs.
Production, Quality, and Compliance
Supplier selection criteria and QA milestones
Choose suppliers with stable lead times and clear QA processes. Visit if possible.
Define QA checkpoints: pre-press, first-off, mid-run, and final inspection.
Color consistency and repeatability across batches
Use color targets and pantone references. Approve press checks on first runs.
Keep digital records of settings to reproduce color later.
Finishing durability tests ( abrasion, scuff, moisture)
Run simple rub and moisture tests on samples. Finishes can fail in real use.
Test in the environments where the product will be stored and shipped.
Food-safe and cosmetic-safety considerations, if applicable
Confirm materials meet food-contact or cosmetic-contact standards. Use approved inks.
Label any limitations on direct contact inside the box.
Compliance with labeling, recycling icons, and warranty info
Place recycling icons and care instructions clearly. Reduce buyer confusion at home.
Include warranty or batch info where it is easy to find.
Costing, Lead Times, and Scalability
Cost drivers: material, tooling, printing, finishes, inserts
Tooling and finishes drive up initial cost. Materials and runs determine unit cost.
Plan for these variables during the budgeting stage.
Break-even analysis for design changes
Calculate how much higher price or volume is needed to cover tooling. Small runs raise per-unit cost.
Use break-even to decide on limited editions versus full production.
Minimum order quantities and ramp-up strategies
Negotiate MOQs with suppliers when possible. Staggered production can reduce inventory risk.
Test with small pilot runs before committing to large volumes.
Packaging optimization for shipping and storage
Design inner packing to maximize pallet efficiency. Nesting can save space.
Balance protective demands with compact packing for lower freight cost.
Case Studies and Inspirations
Case study on a luxury bottle box design and ROI
A luxury redesign used rigid board and foil. The brand saw higher perceived value and better margins.
Sales lifted where the product was merchandised as a gift item.
Eco-friendly box redesign with impact metrics
A switch to molded pulp inserts cut plastic by 90 percent. Shipping weight fell slightly.
Customer feedback praised the honest materials and clear labeling.
Limited-edition collaboration example and outcomes
A co-branded holiday series used a sleeve and a short run. It created buzz and press attention.
The campaign sold out quickly and raised email signups for future drops.
Testing, Feedback, and Iteration
A/B testing concepts for box variants
Test two colorways or two finishes in similar stores. Track sales differences over weeks.
Small tests reveal clear preferences before larger spend.
Consumer feedback collection methods (surveys, social, in-store)
Post-purchase emails and on-pack QR codes gather direct feedback. Social posts capture visual reactions.
In-store staff can report handling issues that buyers do not mention online.
Iterative design cycles and version control
Keep a version log for dielines and finishes. Note what changed and why.
Small incremental improvements reduce production risk and cost.
Common Pitfalls and How to Avoid Them
Overcomplicating structure increasing cost and risk
Complex boxes look interesting but add tooling and assembly cost. Consider simpler forms first.
Test the structure with real bottles before final approval.
Neglecting unboxing experience and user convenience
Fancy closures that frustrate buyers harm the experience. Test opening with real users.
Make the unboxing feel natural and satisfying, without gimmicks.
Inconsistent color reproduction across materials
Different substrates display color differently. Always proof on the final material.
Keep a physical swatch library for reference across vendors and runs.
Ignoring sustainability commitments
Green claims must match materials and labels. Misleading marks damage trust.
Choose suppliers who can document certificates and material composition.
Practical Checklists and Quick Guides
Design brief checklist
- Target audience and price point
- Product dimensions and weight
- Retail constraints and shipping needs
- Budget and timeline
Materials and finishes selection guide
- Match substrate to protection needs
- Pick finishes that survive handling tests
- Choose inks compatible with recycling
Pre-production and proofing checklist
- Approved dielines and dieline printouts
- Signed material and finish samples
- Approved color proofs on substrate
Unboxing experience checklist
- Easy opening and clear pull tabs
- Secure but simple inserts
- Readable copy and visible brand mark
SEO, Content, and Outreach for a Guest Post
Keyword targets related to bottle packaging and custom boxes
Focus on long-tail phrases around bottle box types and materials. Include intent keywords.
Balance product terms with buyer problems like "gift-ready bottle packaging".
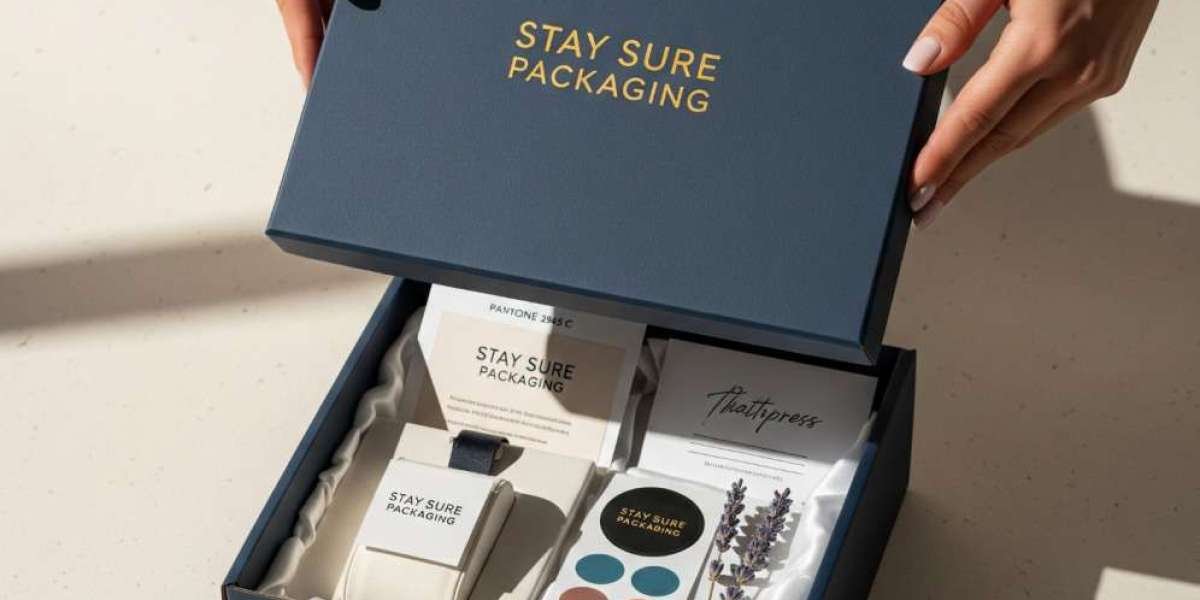
Visuals to include: renderings, dielines, material swatches
Show both rendered and physical images. Include a close-up of finishes.
Dielines help design-savvy readers and potential partners.
Call-to-action ideas for readers: request a sample, download spec sheets
Offer clear next steps like sample requests or spec downloads. Make the process simple.
Samples help clients commit, especially for tactile choices.
Appendices (Optional)
Glossary of box terms
- Dieline: flat template for cuts and folds
- Bleed: color that extends past trim edge
- Mouth: opening of the box
Die line templates and measurement conventions
Provide labeled dielines with mm or inch marks. Note safe area and bleed.
Keep templates versioned and dated for clarity.
Vendor questionnaire for packaging suppliers
- Lead times and MOQ
- Quality control steps
- Material certifications and test reports
FAQs
How do I choose between rigid and folding cartons for premium bottles?
Rigid boxes feel more premium because of weight and construction. Folding cartons cost less and ship flat.
Choose rigid for giftable, high-margin items and folding cartons for volume-oriented lines.
What finishes give the best shelf impact without losing durability?
Soft-touch matte finishes catch the eye and feel premium. A protective overcoat protects against scuffs.
Spot foil or embossing can add focal interest without covering the whole box.
How can I keep costs down while still delivering perceived value?
Standardize the box structure and vary color or finish across SKUs. This limits tooling and setup fees.
Use targeted finishes only on focal areas to save on unit cost.
Which insert types are best for sustainability?
Molded pulp and die-cut cardboard inserts work well for recycling streams. They replace foam and plastic.
Choose inserts made from the same material family as the outer box when possible.
What should I test before full production?
Check fit with physical bottles, drop tests, and finish durability. Color proofs on the final substrate are essential.
Run a small pilot batch to confirm assembly time and real-world handling.